

CISCO Android Connection Tutorial
Note: You must enter your password each time you connect to Cisco because only the username and server are stored in the program.
3
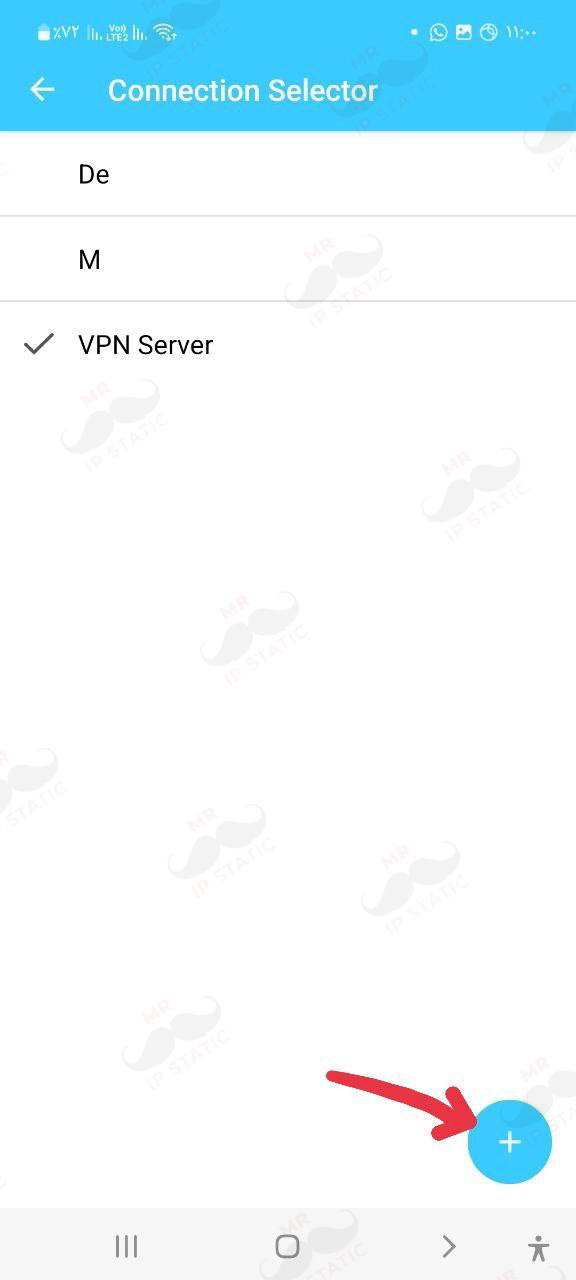
Select the + (Add) option at the bottom of the page.
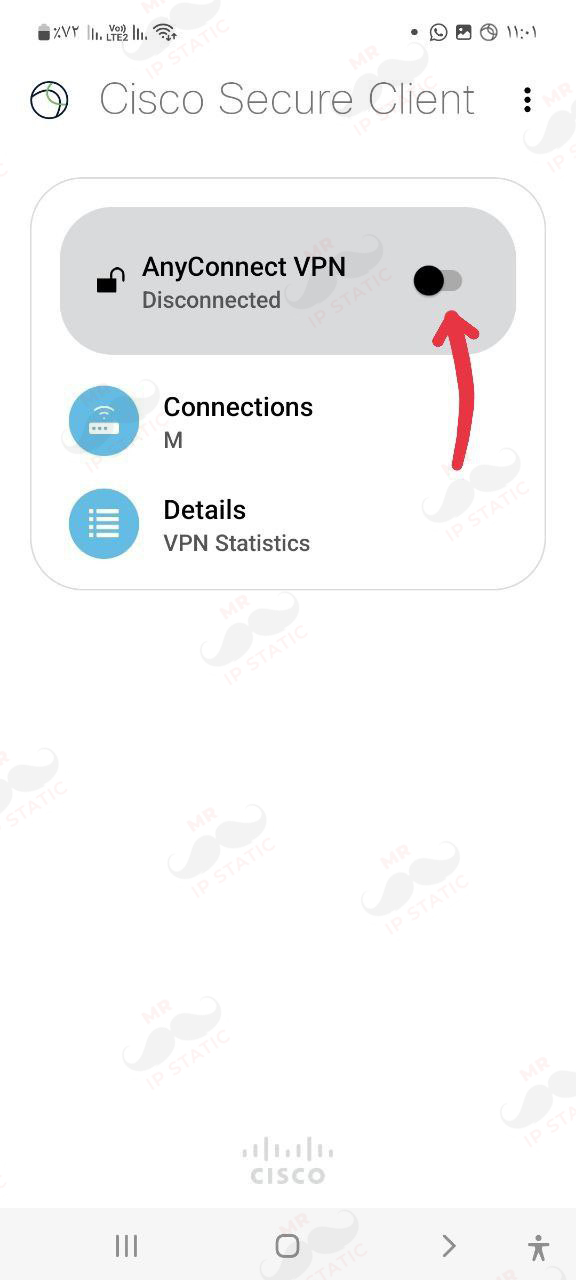
2

Select the Connections option.
6
In this section, click the Connect option.
5
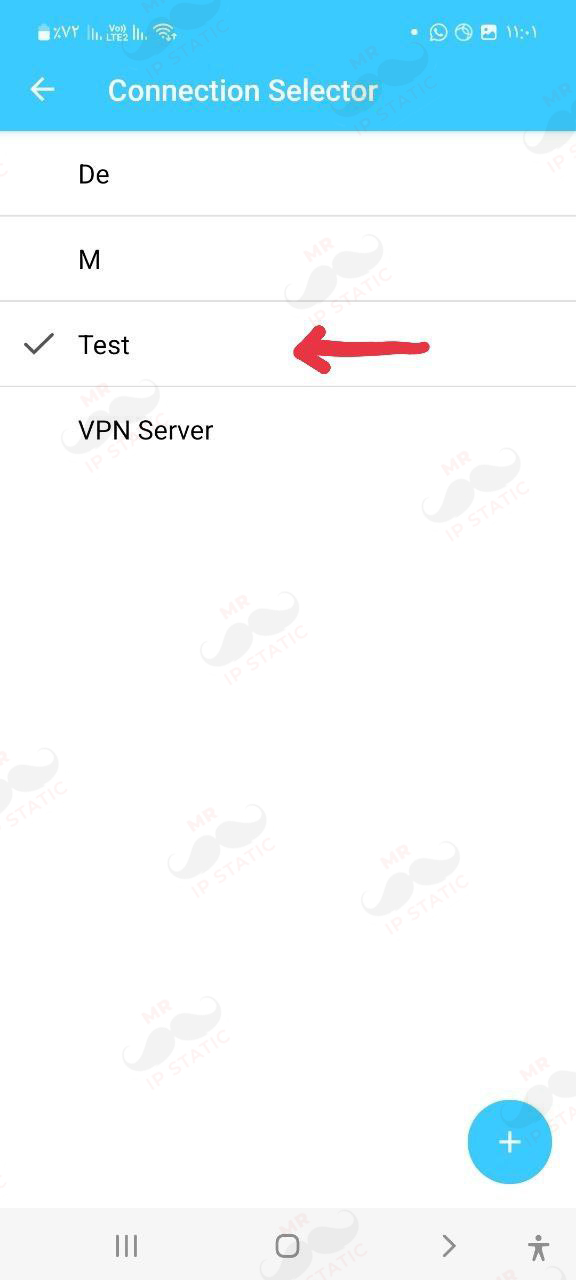
In this section, select the connection you created.
4
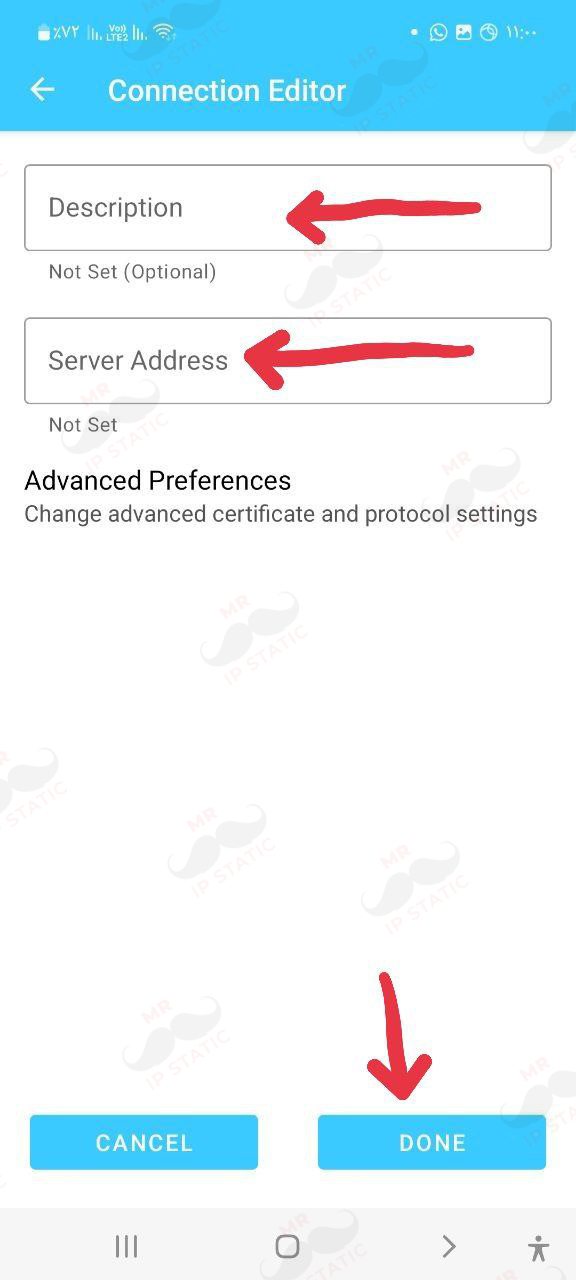
In the Description option, enter the desired name and in the Server Address option, enter the server you purchased and click the DONE option at the bottom of the page.
8
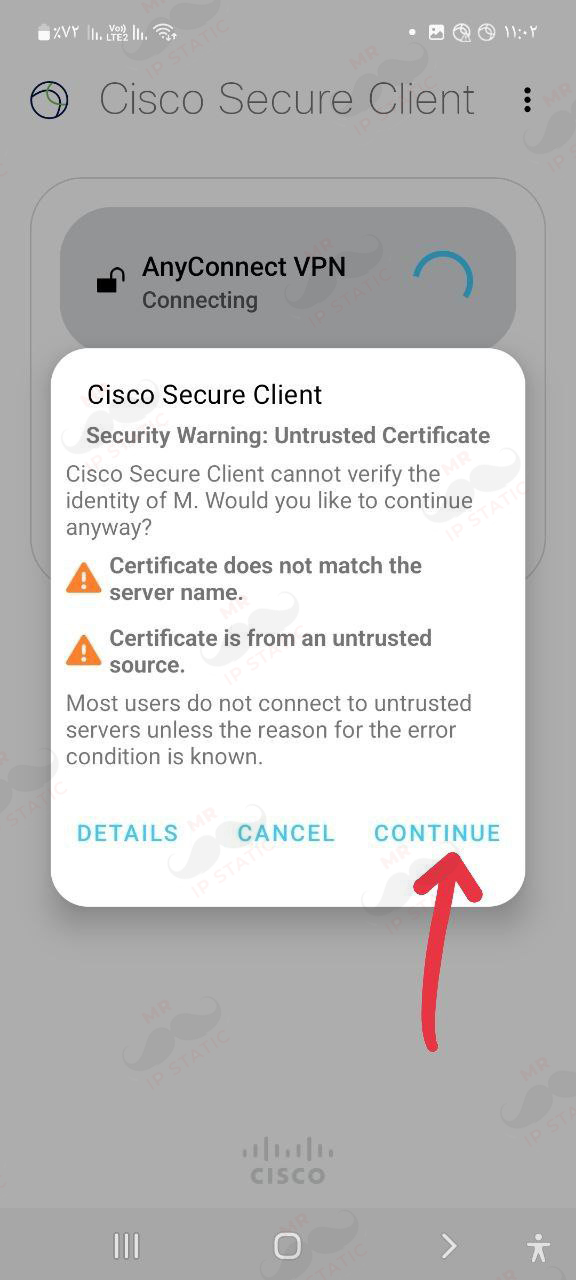
In this section, click the Connect option again and click the CONTINUE option in the displayed message.
8
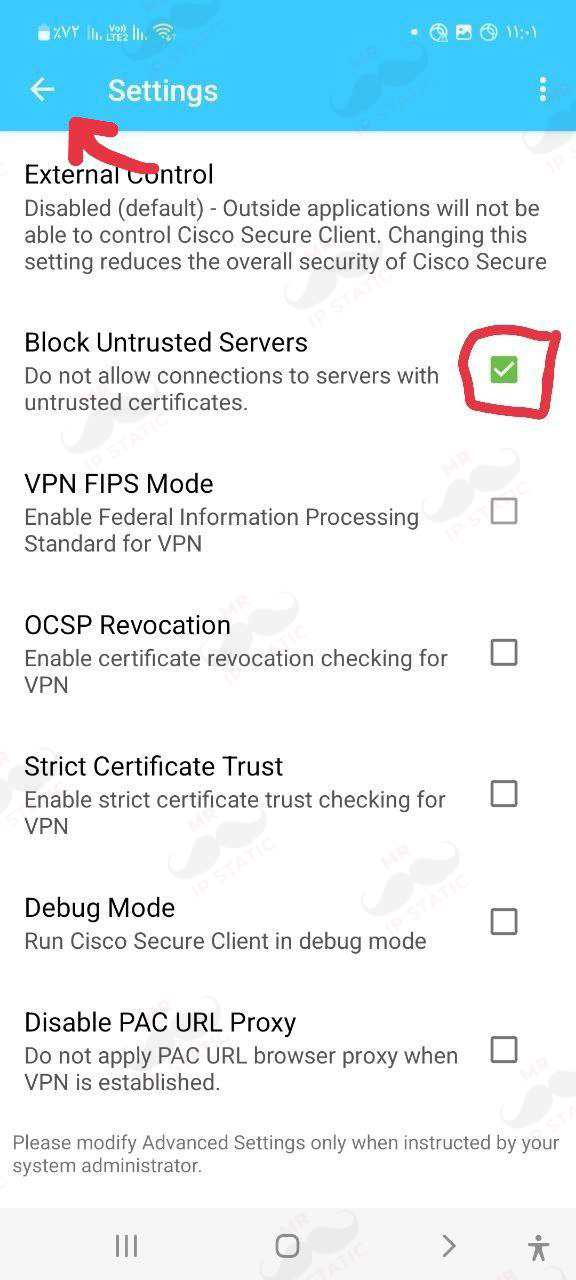
Uncheck the Block Untrusted Servers option and click the Return to Top option.
7
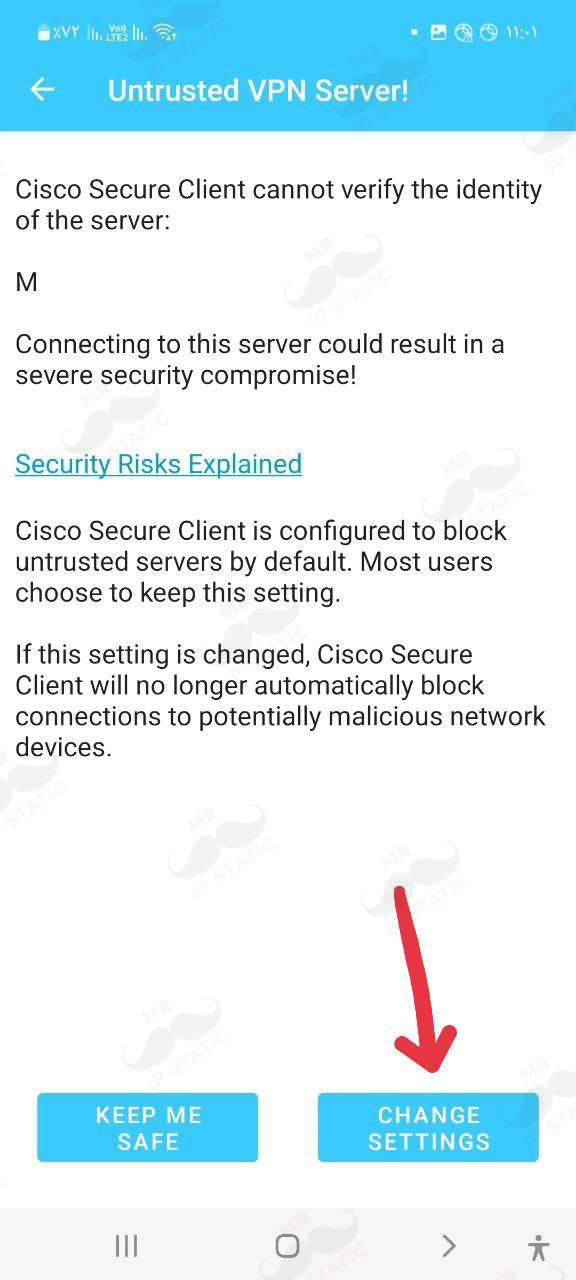
In the displayed permission, click CHANGE SETTINGS.
11
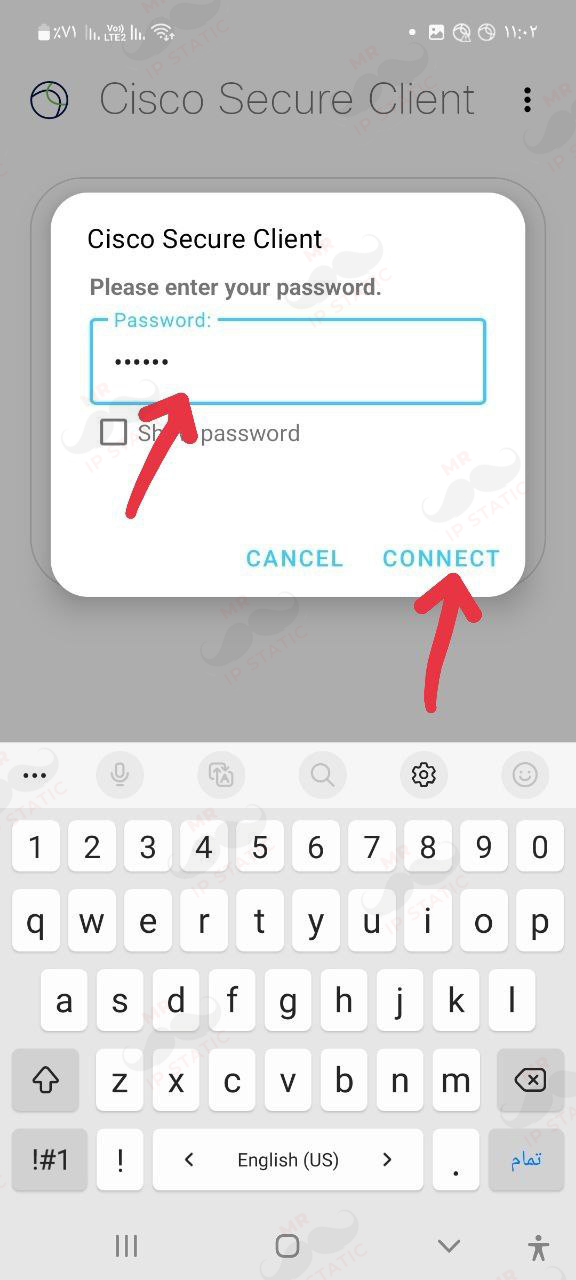
In this section, enter the discount you purchased and click the CONNECT option.
10
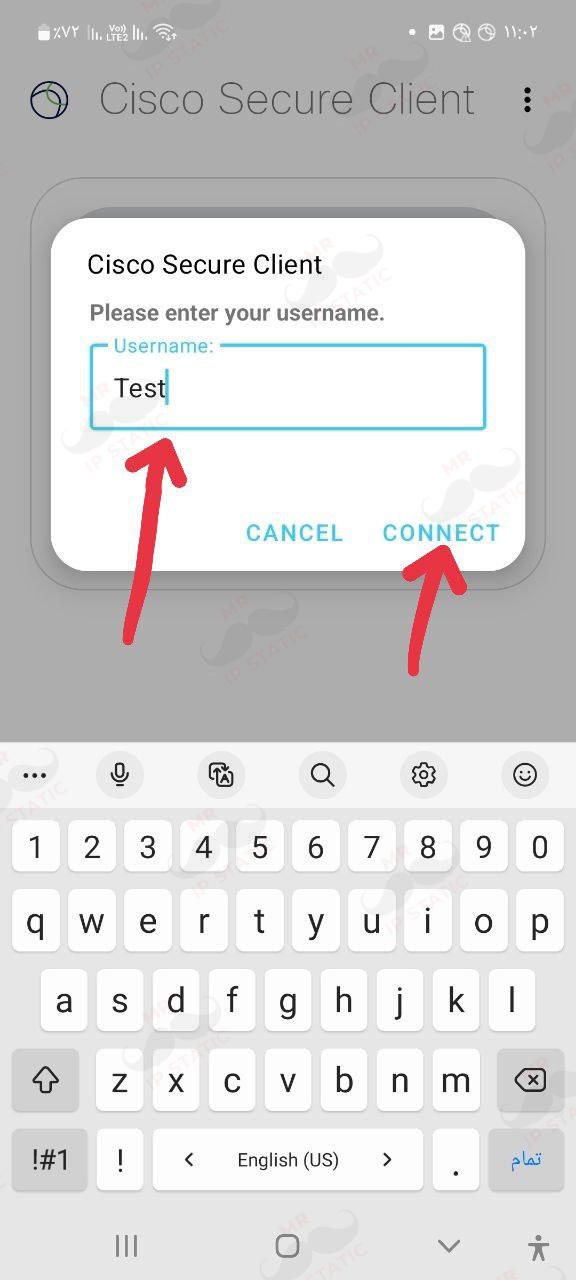
In this section, enter the username you purchased and click the CONNECT option.